We can build and deploy components in Azure from ARM templates using PowerShell or the Azure CLI by using the New-AzResourceGroupDeployment or az deployment group create commands.
Azure Pipelines provides on-demand VM nodes with the necessary tooling installed to perform our deployments. In other words, rather than running the required PowerShell or Azure CLI scripts on our own computers, we can instead use the VMs provided by Azure Pipelines to run the code.
Information
Azure Pipelines allows you to implement Continuous Integration and Continuous Deployment (CI/CD) methodologies, or CI/CD Pipelines. CI/CD is a set of principles that DevOps or software development teams can use when building solutions. It states that changes should be made frequently and then validated by constantly redeploying those changes into an environment.
The VMs are specialist machines that are fully managed by Microsoft, which means you don’t have direct access to them. Instead, you define what is run on them using the Azure DevOps portal. Through the portal, you can build pipelines using the classic method, whereby you can choose from a number of pre-built tasks such as building a library, deploying to a web app, and deploying from an ARM template. Or, you can use a YAML file to define what steps are to be taken.
The following screenshot shows an example pipeline that deploys a VM using the specific Azure deployment task that allows us to define an ARM template. The template itself is read directly from our Azure Repo:
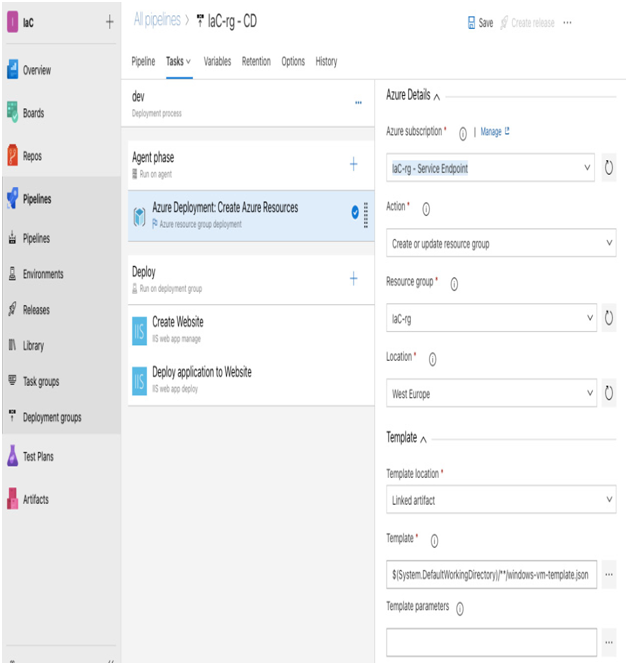
Figure 17.5 – Example of a classic pipeline
A YAML file is a JSON text document that can also define a series of steps you might want to perform as part of a deployment. When creating a pipeline, you are always asked whether to use YAML or the classic method. The following screenshot shows the same set of tasks as those we can see in Figure 17.5, but this time as a YAML file:
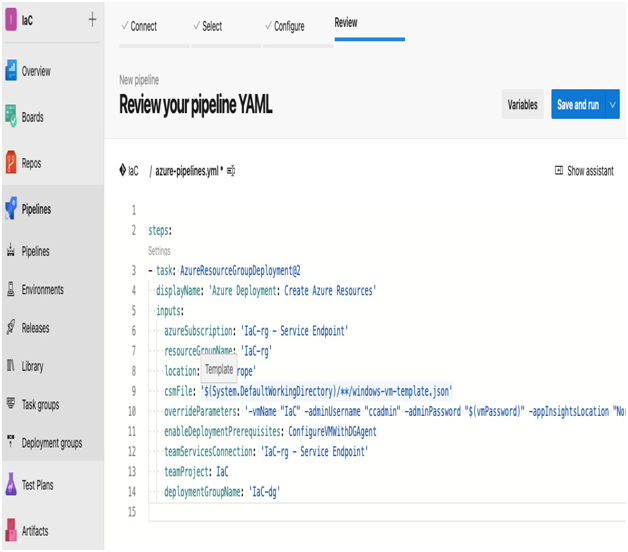
Figure 17.6 – Example of a YAML deployment
The choice between using YAML or the classic editor is largely down to personal preference and skillset. However, one of the great benefits of using YAML is that it is portable; that is, you can store the YAML file with your code, and therefore it is easier to share, manage, and include within your version control.
Finally, using Azure Pipelines, you can deploy to multiple environments. For example, in the following screenshot, we are deploying to a development environment followed by a production environment:
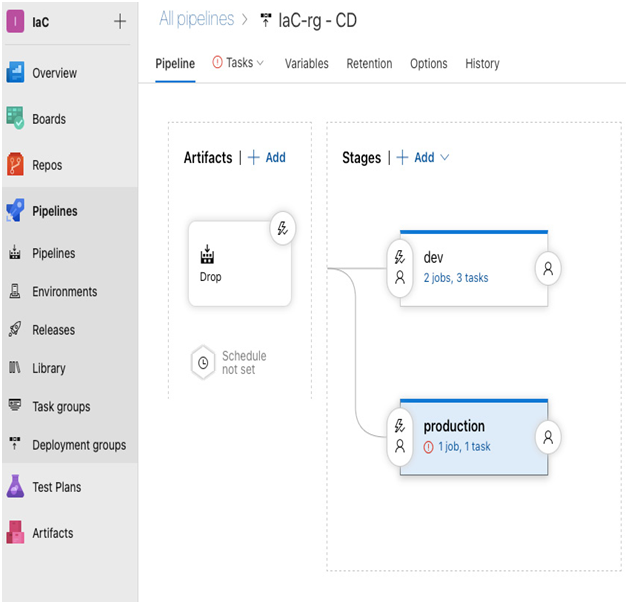
Figure 17.7 – Example of a multi-stage pipeline
The release to each environment can be individually controlled with different triggers and approvals. For example, a trigger can be set on the dev stage so that as soon as the code in the default master branch of your repository is updated, it will automatically deploy those changes. However, the production stage can have an additional approval required before it is deployed, for example, by ensuring a test team manager has validated the development deployment.

Leave a Reply